
|
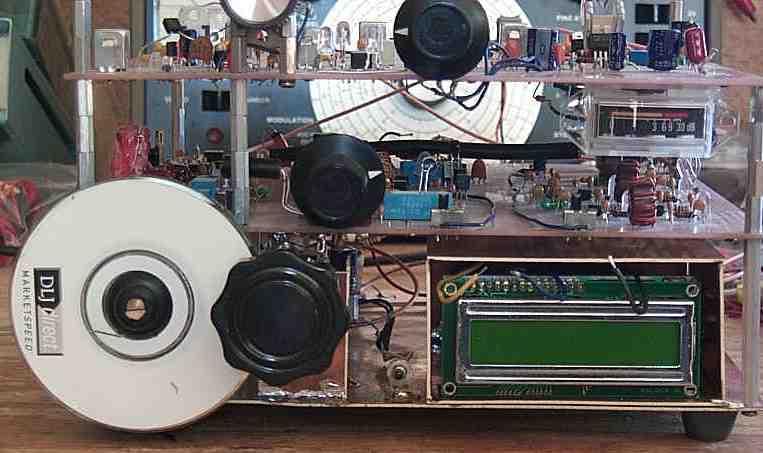
Shown above is the receiver with a small CD-ROM drive used as a reduction drive on the main tuning capacitor. The CD-ROM is held onto the shaft of the capacitor with rubber grommets and is turned by a potentiometer that has had the back removed so it will turn 360 degrees. A rubber grommet is used on the potentiometer to give a firm grip on the CD-ROM drive. Simple instructions follow showing how to set up reduction drive. Also, the end of the capacitor shaft is a "half-shaft", normally used so a knob will not spin on the shaft, but with this set-up, needs a spacer made with a 1/4" wooden dowel, to make up for the missing part of the shaft, so the CD-ROM will turn evenly on the capacitor. Parts needed: |

|
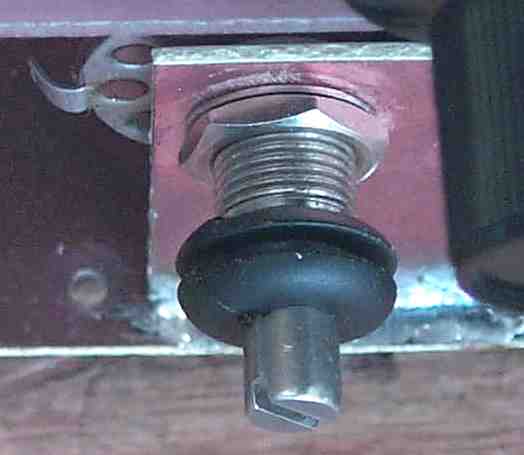
Shown here is a rubber grommet on the capacitor shaft, with the wooden spacer made from 1/4" wooden dowel purchased from the local hardware store. |
|
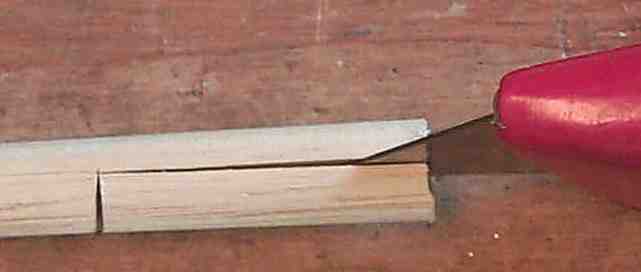
A sharp razor blade mounted in a utility knife works best for cutting the wooden dowel. Measure how long the piece needs to be, approximately 9/16" long, and cut either halfway, as shown in the picture, or the whole piece. Then take the blade and cut through the middle. A slight offset is best, as the spacer can be slightly smaller then the exact half of the dowel. Exercise safety! Remember to cut away from you so if you slip, the blade has no chance to get you. I almost cut myself when I sliced the dowel in half. Use a pair of pliers to hold the dowel or clamp it in a small vise. Just be careful! |
|
The CD-ROM is shown being pushed onto the shaft of the capacitor. The 5/8" grommet is placed in the center of the CD-ROM. The grommet should be a tight fit on the CD-ROM. Then two 38" grommets are pushed halfway in from each side. This gives the CD-ROM a lot of stability and grip on the capacitor shaft. Mount the rubber grommets on the CD-ROM first. Then while holding the wooden spacer on the shaft, push the CD-ROM with the grommets over the capacitor shaft. If you want to make the assembly permanent, a very small amount of rubber glue, or any glue that works, can be used to hold the grommets in place. While the grommets are new and flexible, I have not found the need to glue the assembly. I also show this at hamfests I attend and am always taking it apart to show how it is done.
|
|
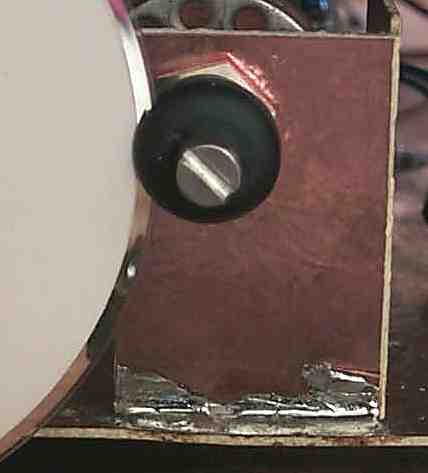
A 3/8" grommet is pushed over the potentiometer shaft all the way back as far as it can go. A small piece of PCB material is cut and drilled so the pot can be mounted. With the CD-ROM in place, the pot mounted on the PCB material, the rubber grommet mounted on the shaft of the pot, the whole thing is pushed up against the CD-ROM with fair pressure and the PCB is soldered to the ground plane. Use only small tacks of solder until you feel you have the right amount of pressure. After the pot is tack soldered on the ground plane, put a knob on the CD-ROM and see how it works. A whole lot of pressure will push the CD-ROM out of place, but just the right amount of pressure will turn the CD-ROM without slipping. The edge of the CD-ROM can be sandpapered to get a better grip on the rubber grommet. I have not found this to be necessary in most cases. |
|
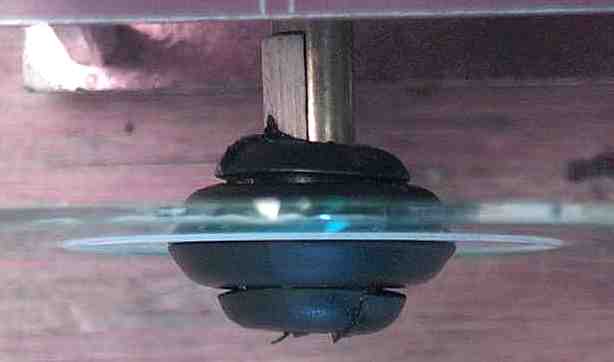
A close-up of the 3/8" grommet on the shaft of the potentiometer. |
|
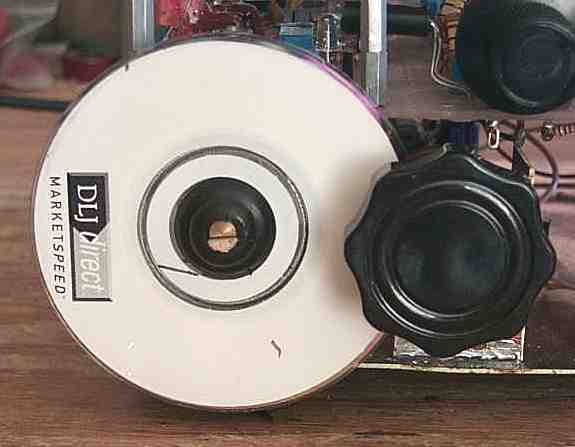
The finished reduction drive ready to go. |
Send E-Mail || Amateur Radio Receivers || Electroluminescent Receiver || Back to Receiver Range and SWL Information